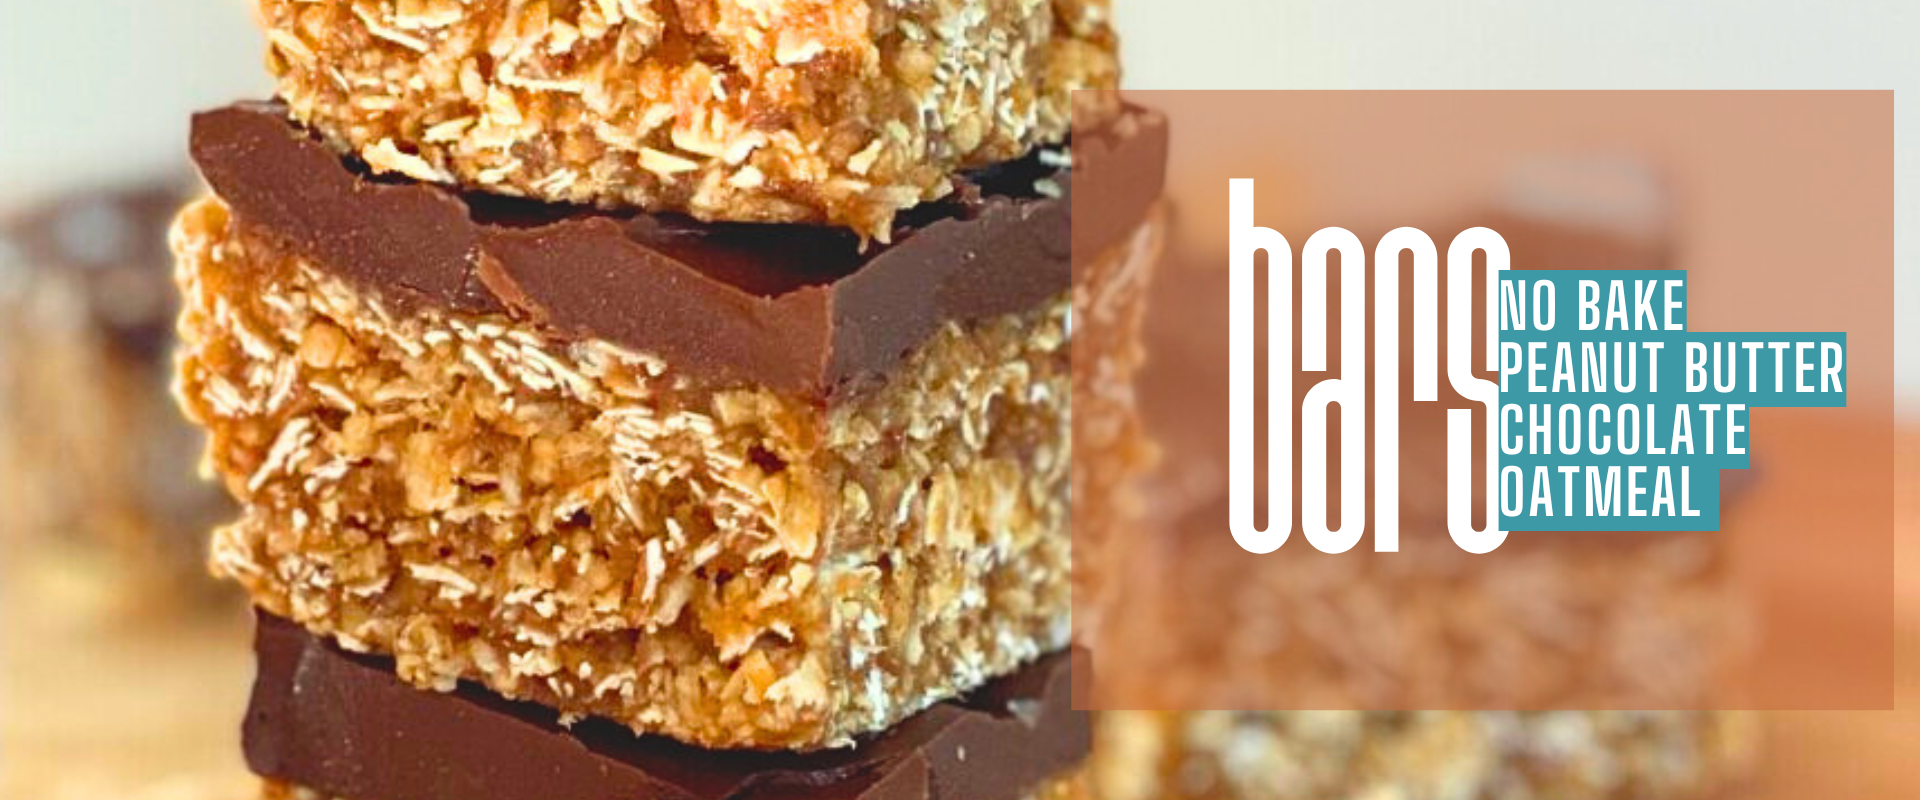
No Bake Peanut Butter Chocolate Oatmeal Bars
These bars were created because sometimes you want something sweet, satisfying, and homemade… without turning on the oven or making a mess that takes an hour to clean up.
No-Bake Chocolate Peanut Butter Oat Bars (Easy, No Oven Needed)
There are certain recipes you make once and immediately know they’re going into regular rotation.
This is one of those.
They’re simple. They’re pantry-based. They slice cleanly. And they disappear fast.
And if you’re anything like me, that combination matters more than a complicated dessert that looks impressive but takes your entire afternoon.
This is the kind of recipe you save “just in case” — and then end up making three times in two weeks.
Why These Bars Work So Well
There’s a reason no-bake desserts trend over and over again on Pinterest.
They remove friction.
No oven.
No waiting for layers to cool.
No worrying about doneness.
You mix, press, chill, slice.
That’s it.
But what makes these oat bars different from other no-bake recipes is the balance. They’re not overly sweet. They’re not crumbly. They don’t taste like straight sugar. The oats give structure. The peanut butter gives richness. The honey brings sweetness without making them cloying. And the chocolate on top seals everything together.
They feel homemade, not processed.
They feel like something you made on purpose.
And they’re sturdy enough to hold up in lunchboxes, on dessert trays, or in the fridge for days.
The Texture Is the Real Win
Some no-bake bars fall apart.
Some are too sticky.
Some are too dry.
These land right in the middle.
The base presses firmly into the pan and chills into a soft-but-set layer. It slices cleanly without crumbling. The chocolate top firms up just enough to give that satisfying snap when you bite into it.
It’s layered without being complicated.
And because everything sets in the refrigerator, the texture actually improves after a few hours.
Ingredients
You likely already have most of this on hand.
- 2 cups old-fashioned oats
- 1 cup creamy peanut butter
- ½ cup honey
- ¼ cup unsalted butter
- 1 teaspoon vanilla extract
- 1 cup semi-sweet chocolate chips
That’s it.
No flour.
No eggs.
No baking soda.
No mixer required.
Just a saucepan and a pan.
Why Each Ingredient Matters
Old-Fashioned Oats
Quick oats can work, but old-fashioned oats give better structure. They hold together more firmly and create a satisfying chew instead of a paste-like texture.
Peanut Butter
Creamy works best for smooth bars. Natural peanut butter can work, but make sure it’s well stirred so the oil is fully incorporated. Too much separation can affect texture.
Honey
Honey binds everything together while adding natural sweetness. It also keeps the bars soft instead of hard.
Butter
Just enough butter to add richness and help everything melt together smoothly.
Chocolate Chips
Semi-sweet balances the sweetness of the honey. You can use dark chocolate if you prefer less sweetness.
How to Make No-Bake Chocolate Peanut Butter Oat Bars
Step 1: Melt the Base
In a medium saucepan over low heat, combine peanut butter, honey, and butter.
Stir continuously until everything melts together and becomes smooth. This usually takes 3–5 minutes.
Do not boil. Just melt.
Once smooth, remove from heat and stir in vanilla.
Step 2: Add the Oats
Add oats directly into the warm mixture.
Stir until every oat is coated and evenly combined.
It should look thick but scoopable.
Step 3: Press Into the Pan
Line an 8×8-inch pan with parchment paper.
Scoop the oat mixture into the pan and press firmly into an even layer.
This step matters. Press hard. Use the back of a spoon or the bottom of a measuring cup. The firmer you press, the cleaner the slices later.
Step 4: Add the Chocolate
Melt chocolate chips in the microwave in 20-second intervals, stirring between each.
Spread melted chocolate evenly over the oat layer.
Step 5: Chill
Refrigerate for at least 1 hour, or until fully set.
Once firm, lift out using parchment and slice into bars or squares.
How Long Do They Last?
These bars keep beautifully.
Store in an airtight container in the refrigerator for up to 5 days.
They actually taste better the next day once fully set.
You can also freeze them for up to 2 months. Just separate layers with parchment.
When to Make These
These are not just “dessert.”
They work for:
- Afternoon snack
- Lunchbox addition
- After-dinner sweet bite
- Potluck tray
- Game day snack table
- Late-night craving
- Bake sale (no oven needed)
- Quick dessert when guests are coming
They’re versatile in a way that complicated desserts aren’t.
Easy Variations
If you want to adjust without complicating things:
Add Sea Salt on Top
Sprinkle flaky salt over the melted chocolate before chilling. It balances sweetness beautifully.
Swirl in Peanut Butter
Before chilling, drizzle extra melted peanut butter into the chocolate layer and swirl with a toothpick.
Use Dark Chocolate
Cuts sweetness and makes them feel slightly richer.
Add Mini Chocolate Chips to Base
Stir into the oat mixture before pressing for extra texture.
Add Crushed Pretzels
For crunch and salt contrast.
Common Mistakes to Avoid
Not Pressing Firmly Enough
Loose pressing leads to crumbly bars.
Overheating the Mixture
If you boil the peanut butter mixture, texture can become grainy.
Skipping Parchment Paper
You’ll regret it when trying to lift them out.
Cutting Too Early
They need to fully chill before slicing cleanly.
Why These Perform Well Online
This recipe checks all the Pinterest boxes:
- No bake
- Chocolate + peanut butter
- Minimal ingredients
- Family friendly
- Easy to photograph stacked
- Simple steps
- Short ingredient list
- Lunchbox-friendly
It’s the kind of recipe people save because they can see themselves actually making it.
Not someday.
Soon.
If You Want to Make It Feel More Like Dessert
Serve slightly chilled but not cold.
Cut into smaller squares.
Drizzle with extra melted chocolate.
Add a small scoop of vanilla ice cream next to a bar for a plated dessert.
It goes from snack to dessert tray instantly.
Final Thoughts
Some recipes are flashy.
Some are complicated.
Some require planning.
This one doesn’t.
It’s the kind of recipe you keep because it makes life easier. It handles the “I need something sweet” moment without turning into a project.
It works on busy days. It works on slow weekends. It works when you forgot you were supposed to bring something.
It’s dependable.
And sometimes that’s exactly what you need.
If you want another easy dessert that feels special without adding extra work, this one is always a good idea.
➡️ No-Bake Cream Cheese Peanut Butter Pie
Get the recipe HERE
➡️ Easy Berry Cream Cheese Dessert Jars
Get the recipe HERE
Looking for something new to make? Start here.
Shop My Kitchen
These are the kitchen essentials I use regularly and highly recommend.
Silicone Cooking Spatula Set
Stainless Steel Knife Set
Premium Heat-Resistant Ground Beef Smasher
Multi-Purpose Stainless Steel Scraper/Chopper
KitchenAid Ribbed Soft Silicone Oven Mitt 2-Pack Set
The Original Pro Chopper – Vegetable Chopper and Spiralizer
Silicone Baking Mat (3-Pack), Reusable Non-Stick
Stainless Steel Measuring Cups & Spoons Set (10-Piece)
Pyrex Essentials 3-Piece Glass Mixing Bowls Set
Affiliate Disclosure:
Some links may be affiliate links. If you make a purchase, I earn a small commission — with no added cost to you.